This Saturday is St. Patricks Day, which pretty much gives you free reign to wear anything green, drink anything green and eat anything green. To be honest, I expected St. Patricks Day to be a much bigger deal in the UK than it is in North America, but since moving here I've discovered it's the other way around - especially in the US. Step into any American shopping mall and almost every store is decked out with green shamrocks and creepy looking Leprechauns, but not in the UK. Don't get me wrong, they do sell the odd bit of tacky green paraphernalia here, but there's not an entire aisle devoted to it like in the US. But the one green thing that I've heard is pretty plentiful on both continents is green beer. Perhaps it's just because of the tension and history between Ireland and the rest of the UK (which I'll admit right now, I really don't know that much about), but in reality it's probably just because Americans love their holidays, and corporate America loves marketing them! And you know what? I love the fact that it's like that. I like the fact that any excuse for a holiday also provides you with the excuse to make loads of fun crafts, special themed desserts, and dress like a total dork if you want to.
When I was a kid one of my favourite things to eat during the first couple weeks of March was the green mint milk shake from Mc Donald's that was oh so cleverly named "The Shamrock Shake." We don't have the Shamrock Shake in the UK (and I very much doubt they have it in Ireland), but I had one last year when we were visiting Texas and it was still as creamy and minty as I remember them to be. So when I thought about what I could make to celebrate St. Patricks day my first thought was a recreation of the Shamrock shake, but then I thought of something even better! A St. Patricks Day Baked Alaska! It's like Ireland and America collided to create this fantastic dessert!
I had actually planned on making 2 versions of my baked Alaska, but that proved more difficult than I had anticipated thanks to the poor selection of ice cream available here. I can't tell you how many stores I went to searching for "just the right" chocolate chip mint ice cream, only to come away with plain old vanilla. You see, there's very few varieties of ice cream (or anything really) compared to the selection in the US (if you've been following my blog for a while, you'll know I have a few issues with the lack of selection in the UK). I managed to find a few different brands that made their own version of chocolate chip mint ice cream, but most either had no colouring (UK manufactures really steer clear of artificial colours and flavourings), or were green with chocolate fudge swirls, which wouldn't work either for reasons I'll explain below.
In the end I decided to make my own chocolate chip mint ice cream, but since I didn't have the time or ingredients to make it from scratch, I just made it using a good quality vanilla ice cream. Making your own chocolate chip mint ice cream is really easy - you'll just need to add some green food colouring, mint extract and mini chocolate chips to some softened vanilla ice cream.
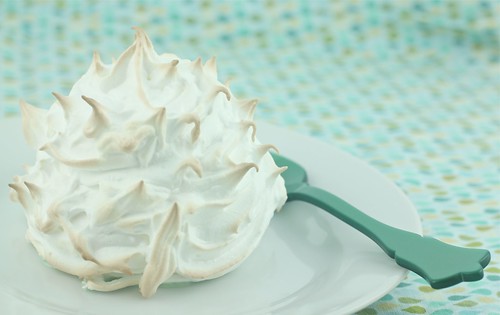
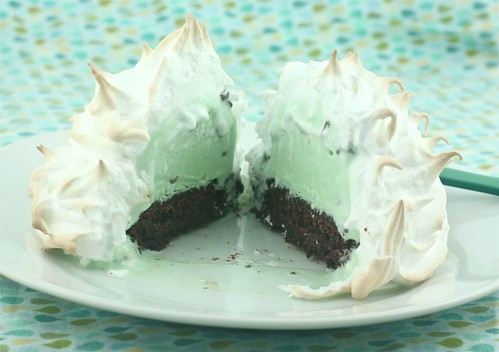
I had also planned on making an Irish Cream version of my Baked Alaska, but only a few grocery stores sell the Bailey's Irish Cream Haagen Daz ice cream, and I couldn't find it in stock at any of them. Needless to say, I was really pleased with the way my chocolate chip mint mini Baked Alaska's turned out. The chocolate chip mint ice cream tasted exactly the way I wanted it to (just like a Shamrock Shake!), and the marshmallowy Italian meringue top was so light and fluffy! I can't quite believe how good these were, and how easy they were to make!
Individual Chocolate Chip Mint Baked Alaska's
(serves 4)
Ingredients:
1 tray of Brownies (from scratch or a box, it doesn't matter)
Chocolate Chip Mint Ice Cream or
6 Vanilla Ice Cream, plus mint extract, green food colouring & mini chocolate chips
2 Egg Whites (Large)
5oz (145g) Sugar
2 3/4 tsp (40ml) Water
Instructions:
1. Line a baking pan with greased foil, and prepare and bake your brownies according to your favourite recipe, or the instructions on the box. I just used a boxed mix because I was short on time. Cool and set aside.
2. Soften your ice cream to soft serve consistency. If you're making your own chocolate chip mint ice cream, put 6 large scoops of vanilla ice cream into a bowl and let soften until you can stir it (soft serve consistency). Once softened, add 3-4 drops of mint extract, a few squirts of green colouring and a 1/4 cup of mini chocolate chips and stir until well combined. Give it a taste, and if you feel like adding more flavouring, colouring or chocolate chips, then now's the time to do so. Spoon your ice cream into 4 silicone baking cups and put them in the freezer for a few hours to firm up.
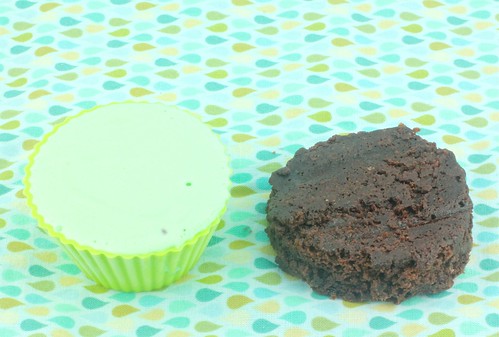
3. Using a round cookie cutter the same diameter as the widest part of your silicone baking cup, cut out 4 rounds from your tray of brownies. What you do with the rest of the brownies is up to you - I won't tell! After your ice cream cups are frozen solid, peel back the silicone baking cups and pop out the ice cream. Place the ice cream cups on top of your brownie rounds, and put them back in the freezer while you prepare your meringue.

4. Pre-heat your oven to 450ºF (225ºC). Place the sugar and water in a small sauce pan, give it a few stirs and then boil until the mixture reaches 240ºF (116ºC) also known as soft ball stage. While the sugar is cooking, start whipping the egg whites in en electric mixer. They should be at soft peak stage by the time your sugar reaches soft ball stage. Once your sugar has reached soft ball stage, turn the mixer to low speed and slowly pour the sugar into the egg whites in a slow stream. Once all of the sugar mixture has been added, turn the mixer back on to high speed and whip until the meringue has reached stiff peak stage. They should be shiny, and the bottom of the bowl should be no longer be hot.
5. Take your individual ice cream & brownie things (what would you call these?) out of the freezer, put them on a foil lined baking sheet and cover with your Italian meringue. You can do this 2 ways: either spoon the meringue overtop of the ice cream and smooth it out with the back of a spoon or small spatula, or use a piping bag and pipe the meringues all around the ice cream and brownie. Whichever method you choose, just make sure to fully cover the ice cream with meringue so that it's fully insulated in the oven. Bake in the oven for 4-6 minutes until the meringues are nice and golden brown. Serve immediately, and enjoy!

** These individual baked Alaska's keep in the freezer uncovered for up to 5 days. Simply take them out of them freezer and bake as instructed above. This makes them perfect to prepare ahead for a dinner party!
Comments
Post a Comment