A couple of weeks ago while I was away on holiday introducing my 7 month old son to his grandparents in Canada, the lovely folks over at Lakeland contacted me to see if I'd like to try some of their new Easter chocolate making supplies. Heck yeah! I love making my own chocolate, and used to do it all of the time back in Canada. In fact, one of the places on my "to go list" while I was back home was my local cake and chocolate supply store so I could pick up some chocolate making supplies. So you know what that means - obviously the people at Lakeland are mind readers!
What a nice surprise it was coming home to a big box full of chocolate making goodies! There were several different chocolate moulds - little ducks (complete with bow ties), bunny pops, bunnies, ducks and eggs, and an extra large egg mould. There was also a chocolate melting pot, some cute little treat boxes and a super helpful silicone spatula with a built in thermometer - intended for chocolate making, but I think it would be perfect for custard type recipes. I didn't even know such a thing existed!

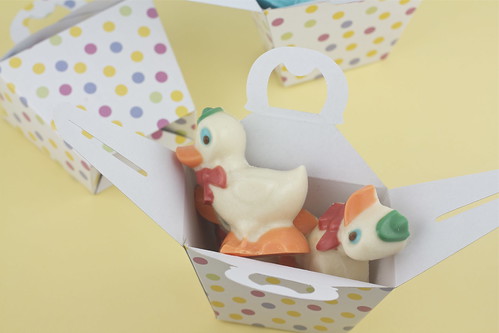
There was so many fun goodies to play with, it was hard to decide what to make first. I settled on the little ducks so that I could play around with the coloured Wilton candy melts that I had accumulated over the past few months.
The green duck mould is a Lakeland exclusive. The ducks themselves were quite a bit larger than the ones in the mixed Easter shape mould (containing bunnies, ducks and eggs) by Silkomat. The design of Lakeland's green duck mould gives a more childish feel to the characters compared to the Silkomat mould. It also provides a bit more depth to the ducks as well, which means that you can have some real fun decorating the chocolates using different colours of candy melts like I did.

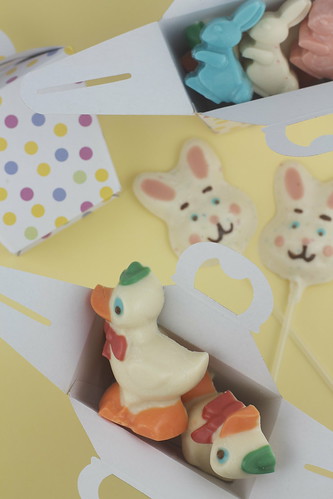
I often use little brushes to paint the coloured chocolates into my moulds, but I couldn't find any laying around so instead I just used some toothpicks to "paint" the small areas with the coloured candy melts and this seemed to work just fine. I used some regular chocolate in the red melting pot to fill the bunny and smaller duck moulds. It was really quite useful, although a bit small so I would have to refill it numerous times if I used it for some of the larger chocolates.
Both of these moulds had a nice smooth silicone finish on the inside which allowed for the chocolates to come away effortlessly, and also provided a smooth and shiny finish.

I packed the ducks and bunnies into the little treat boxes that Lakeland sent so I could give them for the kids at the BBQ we're going to on the weekend. Each treat box holds about 3 of the larger ducks, or 5 of the smaller bunnies.
As for the bunny pop mould.... Well to be honest the design kind of creeped me out a bit with it's squiggly mouth, so I changed the mouth design using some melted chocolate into something a little less off putting. I was also surprised to discover that the mould was made of metal. I've never seen a chocolate mould like this one before - it was almost like a teeny tiny non-stick baking pan of mini bunny heads (I forgot to take a picture of this). I made half of the bunnies using plain white chocolate melts and the other half using a combination of white melts and confetti melts. When it came time to remove the bunnies from the moulds, they didn't come out nearly as easily as the ones from the silicone moulds. In fact, out of the 6 bunnies I made only 3 came out in tact as the top layer of the other 3 stuck to the mould. If the mould was made of silicone or clear plastic it would have been flexible enough to twist and release the bunny pops. Oh well, the kids that I'm giving them to won't even notice!

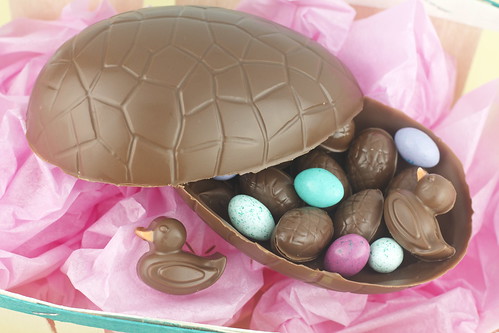
The giant Easter egg mould, and trays of mini eggs were closer to the types of chocolate moulds I've used in the past. I like these types of moulds the best because they're see through which allows me to look at the bottom of the mould in order to ensure that my chocolates don't have any air bubbles in them. There's nothing worse than an air bubble on the surface of your chocolates. You can get rid of air bubbles by tapping your filled chocolate moulds on a hard surface like the counter top. Do this several times and you'll be able to see them rise to the surface and pop. This will also help to level out and spread your chocolate to all areas of the mould.

The giant and mini eggs were easy to make since I was only using one type of Chocolate. I used Waitrose own brand milk chocolate because it would taste a lot nicer than the Wilton candy melts. The only issue was that it was that the chocolate quite soft, especially considering my flat was so warm that it was hard to touch the eggs without them starting to melt. I filled my giant egg with some of the smaller eggs, a few ducks and I threw in some Easter Peanut Butter M&M eggs for a bit of added colour.
After I took these pictures I re-chilled my giant egg and made a few more ducks and chocolate mini eggs to put inside before I glued the 2 halves together with some meted chocolate. I wrapped a blue sheer ribbon around the egg to hide where the two halves met, which really polished off the look. Unfortunately I forgot to take a picture! I didn't use the thermo spatula this time, but I can definitely see it coming in handy for loads of other things so I will let you know how I get on with it soon!
Thanks again to Lakeland for letting me have a play around with all their fun Easter stuff! I had a great time making these chocolate, and my family and friends will no doubt have a great time eating them!
What a nice surprise it was coming home to a big box full of chocolate making goodies! There were several different chocolate moulds - little ducks (complete with bow ties), bunny pops, bunnies, ducks and eggs, and an extra large egg mould. There was also a chocolate melting pot, some cute little treat boxes and a super helpful silicone spatula with a built in thermometer - intended for chocolate making, but I think it would be perfect for custard type recipes. I didn't even know such a thing existed!

Both of these moulds had a nice smooth silicone finish on the inside which allowed for the chocolates to come away effortlessly, and also provided a smooth and shiny finish.

As for the bunny pop mould.... Well to be honest the design kind of creeped me out a bit with it's squiggly mouth, so I changed the mouth design using some melted chocolate into something a little less off putting. I was also surprised to discover that the mould was made of metal. I've never seen a chocolate mould like this one before - it was almost like a teeny tiny non-stick baking pan of mini bunny heads (I forgot to take a picture of this). I made half of the bunnies using plain white chocolate melts and the other half using a combination of white melts and confetti melts. When it came time to remove the bunnies from the moulds, they didn't come out nearly as easily as the ones from the silicone moulds. In fact, out of the 6 bunnies I made only 3 came out in tact as the top layer of the other 3 stuck to the mould. If the mould was made of silicone or clear plastic it would have been flexible enough to twist and release the bunny pops. Oh well, the kids that I'm giving them to won't even notice!
After I took these pictures I re-chilled my giant egg and made a few more ducks and chocolate mini eggs to put inside before I glued the 2 halves together with some meted chocolate. I wrapped a blue sheer ribbon around the egg to hide where the two halves met, which really polished off the look. Unfortunately I forgot to take a picture! I didn't use the thermo spatula this time, but I can definitely see it coming in handy for loads of other things so I will let you know how I get on with it soon!
Thanks again to Lakeland for letting me have a play around with all their fun Easter stuff! I had a great time making these chocolate, and my family and friends will no doubt have a great time eating them!
Comments
Post a Comment