A few months ago I was walking through Clapham Junction - an area just south of London that I don't really frequent that often. It's a pretty area lined with cutesy shops and funky eateries. It's also where I found the cutest little cookie cutters. You see, I was walking along when all of a sudden I noticed a pink store. Yes, a PINK store! How could I not take notice of a pink store?!? It wasn't just any pink store either. It was one of Jaime Oliver's Recipease stores. Recipease isn't just any old store - it's a cooking school, a kitchen store, a cafe and a prepared food store all in one. How did I not know about these before??? Note to self - I must go back and take a cookery lesson there. The pasta making ones sound like great fun!

I had a little wander around the store which sold loads of cool things like freshly baked bread, food storage containers with pastel flip lids, kitchen gadgets and the cutest little cookie cutters. Cookies cutters which I just had to have!
These weren't just any cookie cutters - they were hanging cookie cutters! Don't laugh. I'm easily excitable when I find cool new kitchen "thingys".
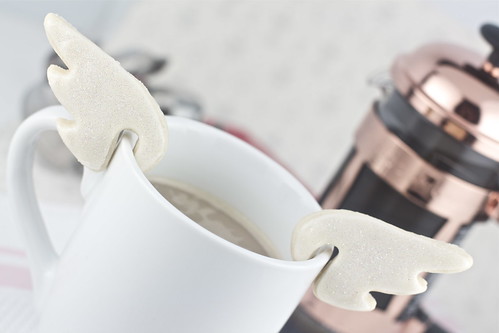
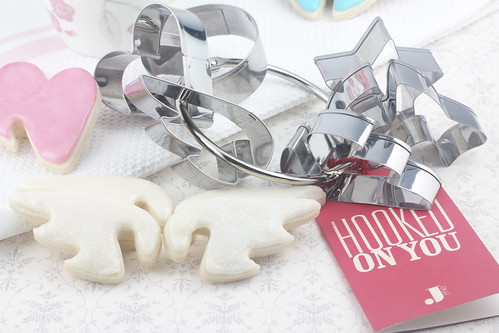
The cookie cutters are sold in a set of 6, although 2 of the cutters are a pair. There's a heart, a star, a circle, a little bird and a pair of angel wings. And they're all designed to hang on the side of your coffee mug or tea cup.

I've never been one to fall into the English habit drinking a cup of tea, alongside a biscuit (cookie) but lately I've found myself wanting to enjoy just a tiny treat with my afternoon coffee. These little cookies are the perfect solution. Simply make yourself a cup of coffee or tea and hang one (or two!) of these fun little cookies on the side of your mug, pop yourself in your favourite chair, put your feet up, relax and enjoy!
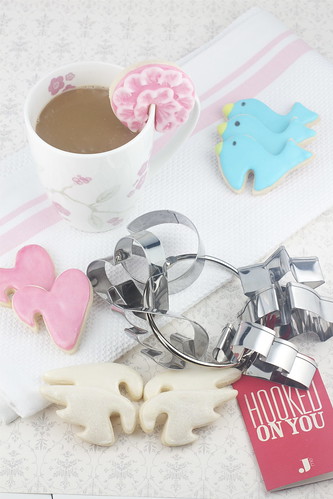
You definitely don't have to go crazy and decorate them like I did, but I saw a fun opportunity and I took it! I used royal icing to flood all of my cookies, and then I did something a bit different to each of them. I shook some opalescent edible glitter on one pair of angel wings while the royal icing was still wet, and I used a silvery pearl lustre dust on the second pair once the icing was dry. I kept the birds fairly basic and just added some yellow beaks and drew on black eyes with a food marker. I used gold lustre dust on the star and I pink lustre dust on the hearts and circles, and tried out a new royal icing painting technique that I'd been wanting to try for ages now.
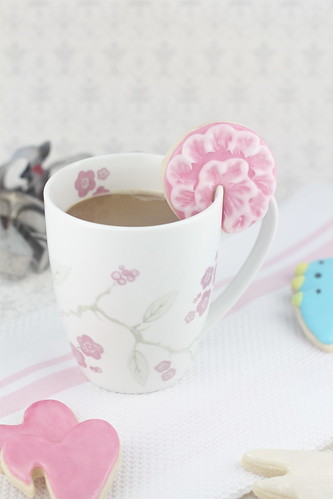
The painting technique is so simple and just involves piping a curved line of royal icing on your cookie, and then taking a dry paint brush and dragging the royal icing inwards. Although I thought my first try turned out ok, I wasn't entirely happy with my painted cookies as I think my icing consistency was a bit off. Coincidentally the weekend after I made these cookies I saw this same painting technique being demonstrated at the Cake International Show, so I picked up some tips there. I will definitely be making some more of these pretty painted cookies that I'll share with you soon. I think my pink one matches the flowers on my mug!
I used Peggy Porschen's sugar cookie recipe which is a favourite of mine. Her dough holds it's shape and doesn't spread while cooking, plus it tastes great too. You can get the recipe for the sugar cookie dough along with Peggy's royal icing recipe and all my cookie decorating tips and tricks here.
Comments
Post a Comment