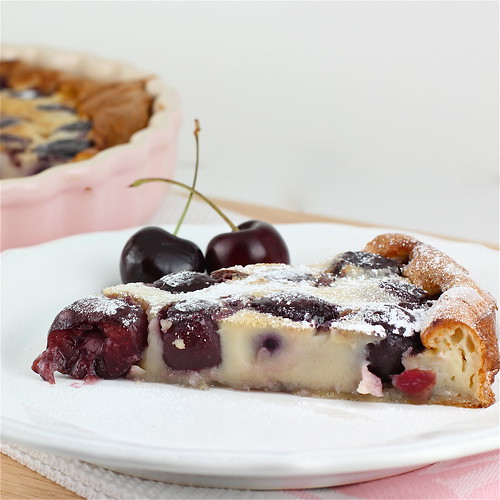
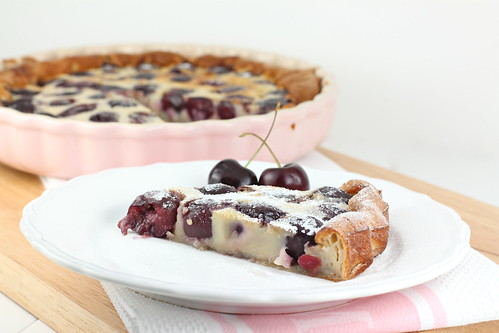
Ahhh cherry clafoutis..... Sigh. Why have I not made you before? This post is somewhat embarrassing to write. I've been wanting to make a cherry clafoutis for years. Literally. I'd seen them time and time again on foodie sites like Food Gawker and Taste Spotting, and always thought they looked so good. I don't know what on earth took me so long to make one, but it probably had a lot to do with the fact that I'd have to pit a gazillion cherries. Plus, I was under the impression they were extremely time consuming and difficult to make. My bad. They're super easy. In fact, it's probably one of the easiest things I've made in ages. I think I'll make this my default dessert for when company comes around.
Like I mentioned before, part of what was really holding me back from making a cherry clafoutis was pitting all those cherries. I'd been buying cherries all summer for Jayden and I to eat. I was pitting them in a couple of different ways - by scoring an "x" on the top and bottom with a knife, and then pushing out the pit with a straw or chopstick, or by simply cutting them in half and picking the pits out with my fingers which was horribly messy and forced me to get my hands dirty. I hate getting my hands dirty.
Just when I thought I was going to have to resort to trying out another DIY cherry pitter method (there's a bunch of suggestions here on my Pinterest board), I was contacted by the folks over at OXO Good Grips to see if I'd like to try out their new version. So thank goodness for my new OXO Cherry pitter which made the whole pitting process quick and easy.
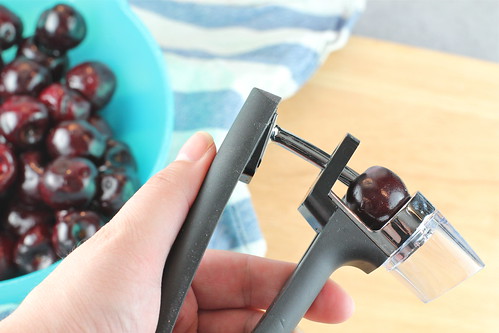
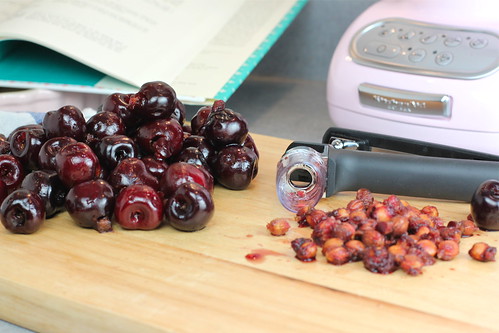
The cherry pitter made doing the job so much easier! And I was really impressed with how well it was designed - there's a little switch at the back that locks the pitter into a closed position so that the spikey bit doesn't get caught on everything in my gadget drawer. It's also got a splash guard on it, which I think should be essential on every cherry pitter no matter what brand it is. The splash guard was amazing and confined all the splatter and mess which meant that my Julia Child recipe book I had sitting near by was spared from any straying cherry juice. And rather than taking 20 minutes to pit all the cherries, it only took about 2 minutes.
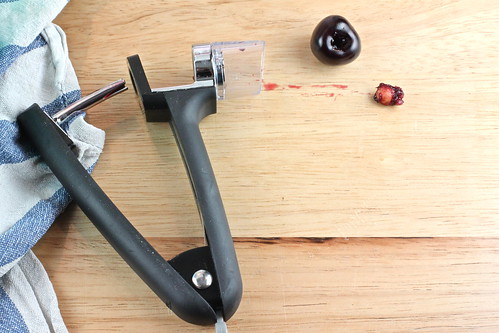
Splat!
Even though I'd been wanting to make a cherry clafoutis for ages, I'd never really settled on a recipe. Sure all the clafoutis photos on Food Gawker and Taste Spotting looked delicious and I'd probably "favourited" about 50 different pictures, but I couldn't decide on which recipe I should try. So, I went back to basics and decided to go with Julia. You really can't go wrong with a Julia Child recipe can you?
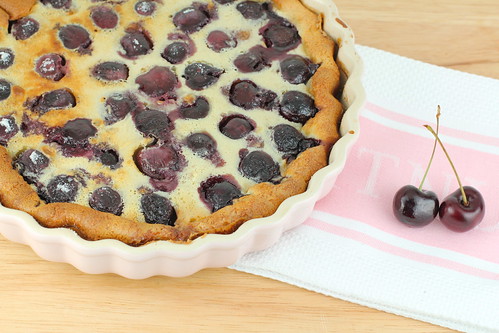
I had done a tiny bit of research on cherry clafoutis before I made mine, and the one thing that stood out was that the really authentic French recipes told you NOT to pit your cherries. Why? Because supposedly once baked, the cherry pits release a subtle almond flavour that gives the clafoutis a really nice flavour. I opted to pit my cherries, and then add a bit of almond extract to compensate. The result was absolutely delicious. The almond flavouring really complemented the sweet juicy cherries and syrupy clafoutis. I was amazed. Why on earth had I not made this before? It's seriously easy to make. Pit your cherries, throw the rest of the ingredients a blender for a couple minutes, pour and bake. That's pretty much it.
Cherry Almond Clafoutis
(Slightly adapted from Julia Child's Mastering The Art of French Cooking)
Ingredients:
1 1/4 Cups (295ml) milk
2/3 Cup (150g) Sugar, divided
3 eggs
1Tbsp Vanilla Extract
1/4 tsp Almond Extract
1/8 tsp salt
2/3 Cup (83) Flour
Butter for greasing
3 Cups Pitted Cherries
Powdered sugar for sprinkling
Instructions:
1. Preheat your oven to 350ºF (175ºC), and lightly butter a 7- to 8-cup baking dish or pie plate. Wash and pit your cherries. Set aside.
2. Place milk, 1/3 cup (75g) sugar, eggs, vanilla, almond extract, salt, and flour in a blender and blend at high speed for 1 minute. Pour a 1/4-inch layer of batter into the greased baking dish. Place the dish in the hot oven for about 7-10 minutes until a film of batter has set in the bottom of the dish. Remove from heat.
3. Place the cherries evenly over the batter and sprinkle the remaining sugar over top. Slowly pour the rest of the batter over the cherries and smooth the surface with the back of a spoon if needed. Place the dish in the middle of the oven and bake for about 45 - 60 minutes until done. The clafouti is done when it has puffed with a golden brown top, and when a toothpick or knife is inserted into its center and comes out clean.
Let the clafoutis cool slightly (about 5-10 minutes) before sprinkling top with powdered sugar just before serving.
The clafoutis is best served warm, but I'll admit to eating a left over slice straight out of the fridge and it being equally delicious as it was warm.
I realise that cherry season is nearing an end, but if you can get your hands on some I would definitely suggest making this dessert. I plan on making it once more before all the cherries have completely disappeared from my local supermarket. But if you're too late you can also substitute the cherries for pretty much any other fruit such as pears, plums, apples etc and make a different version of clafoutis.
With thanks to OXO Good Grips for the cherry pitter, which will now double as an olive pitter during the winter months!
Comments
Post a Comment