I have a confession to make - I lost my mojo. My baking mojo. That kind of explains the lack of posts over the past month. I got caught up in other stuff that was far less fun and exciting (aka: work), but I'm pleased to say that I've picked myself up, dusted off my trusty pink KitchenAid and got back into the kitchen and baking again. It felt good. All I needed was a a little nudge to get me back in there.
And that nudge came in the form of some awesome spice jars sent to me by Brabantia. To be honest I didn't know a whole lot about Brabantia before they sent me the spice jars, except for the fact that they made really swanky garbage bins. I even thought I had one (my husband bought it before I moved here to the UK from Canada), but when I looked online to see about getting a replacement bin for ours which is now broken I quickly (and disappointedly) realised that I in fact did not have one. I still needed a replacement so had a play with Brabantia's really cool online tool that allows you to completely customise the colour of your bin from over 200 colours. I've been trying to find a light pink bin that matched all of my pink KitchenAid stuff for ages, but every one I've seen so far has been really tacky. Not these! But when I saw the £325 price tag that went along with them, I realised I was going to have to continue my search. Don't worry though, their bins aren't all that expensive

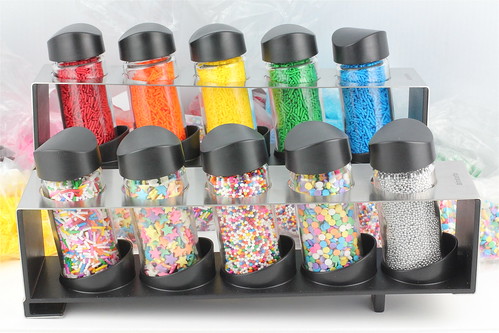
The good news is, the spice jars are much more affordable and they're still super stylish as well. They come in a set with 5 jars and a nice matt stainless steel rack that can be fixed directly onto the wall or hung on a specially designed rail that can also accommodate several of Brabantia's other kitchen products. But I had no intention of using these spice jars for spices. You see, on a recent trip back home to Canada I discovered a bulk food store that I quickly became obsessed with. It was called Bulk Barn, and I made at least 5 visits there in 3 days. This place has everything you'd need to decorate a birthday cake or kit out a party. And best of all, it was all in BULK! Sprinkles, Merckens Candy Melts, Royal Icing Roses, Callebaut Chocolate, even piping tips and buttercream! I was in heaven. I made sure to stock up on every colour of sprinkle my heart desired. But unfortunately this has left me with at least a dozen plastic bags filled with sprinkles that I've had to tuck in a drawer.
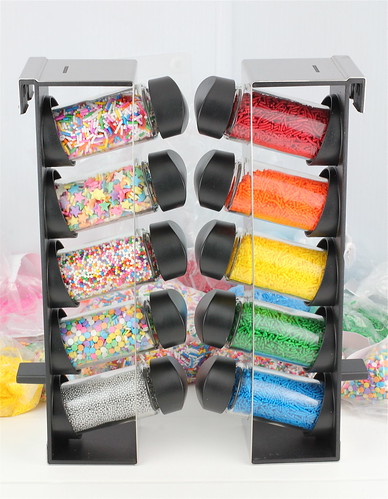
So last weekend instead of going out to dinner or a movie, I stayed at home and organised my sprinkles in my new spice jars like a total dork. And I loved it! So now rather than bags and bags of sprinkles that sit tucked away in a drawer or cupboard, I can proudly hang them in the jars on the mounted display rail above my kitchen counter. I had so many different colours and types of sprinkles that I didn't even have enough jars. I had a rainbow of colours to suit every season, so that meant I had both black and orange sprinkles. And you know what that means..... a Halloween cake was beckoning to be made!
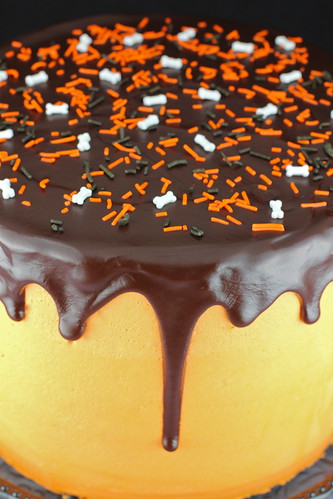
I ended up making a 3 tiered chocolate and vanilla cake covered in orange buttercream and dripping in chocolate ganache. And of course, it was topped with lots and lots of sprinkles.
The spice jars came with two different inserts that worked great for sprinkling just the right amount of sprinkles onto my cake.

The entire cake was an experiment - I'd never made anything like it before. There was two different cake recipes involved, neither of which I'd tried before. I also tried wrapping my cake tins in cold wet towels which really helped to keep my cakes perfectly flat and level. Then I iced the whole cake in buttercream with a super smooth finish, rather than using fondant. And finally I covered the top of the cake with a dark chocolate ganache, pushed it right to the edges and hoped for the best. I was really pleased with the results of this cake. But because there are so many different elements that were involved in making it, I've decided to post the recipe and instructions in another post. So if you're interested to find out how I made this cake, then please check back for the full post and recipe tomorrow.

Comments
Post a Comment