I've always been one to challenge myself when baking and decorating, especially with my cakes. I've taken a few courses recently that I've really enjoyed, and I always look forward to coming home and practicing my newly learnt skills. Trying new things is all part of the fun. And with such a wide array of websites like Pinterest, Food Gawker and my favourite foodie blogs to inspire me, I'm constantly adding new things I want to try to my "to bake" list.
One of those things that's been on my "to bake" list for ages is brioche, but I've always shy'd away from it because pretty much anything involving yeast scares the crap out of me. I always worry that I'll either kill the yeast by using water that's too hot, or that I'll over work the dough so the bread is too dense and tough.
Luckily I was recently given the opportunity to put my yeast phobia to rest when I was invited to attend a blogger brioche masterclass put on by folks from Brioche Pasquier, France's premier brioche brand.
The event took place at the Fair Cake decorating studio in Greenwich, which was a lovely venue albeit a little short on oven space.
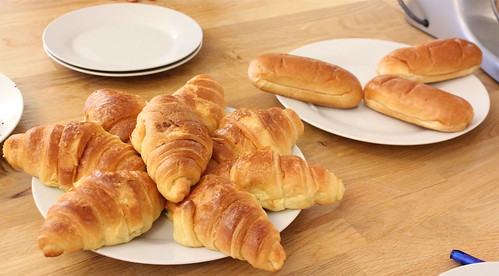
When we arrived at the studio there were plenty of tasty Brioche Pasquier products on offer to tempt out taste buds. To be honest I'd never tried any of their products before so it was a good opportunity to see and taste the numerous products they sell - I had no idea there were so many! My favourite were probably the lemon curd filed brioche rolls.
Once we got got underway at making our brioche buns I was quite surprised at how simple the recipe was, and how little effort was actually required when using a stand mixer.

A few important tips we learned during the day will help you to create the perfect brioche buns at home:
- Make sure to use strong flour which has a higher protein count than regular plain flour.
- When adding the dry ingredients to the mixing bowl, make sure to keep the yeast completely separate from the salt by adding them to opposite sides of the bowl. *Yeast does not like salt.
- The dough should be smooth and shiny, and have enough elasticity to allow you to stretch it thin enough see / read through. If it tears too easily while trying to stretch the dough then it needs more kneading. I was surprised at how long mine took in the mixer to get to the appropriate consistency - about 15 minutes!
- The brioche should be baked on parchment sheets laid directly on the oven rack, not on a baking sheet.


The end result of our brioche making efforts left us with approximately two dozen beautiful golden little buns topped with sweet crunchy pearl sugar.
Makes 18
Ingredients:
For the Brioche:
500g Strong Flour
10g Salt
120g Caster Sugar, divided
40g Yeast
90ml Water
3 Eggs
125g Unsalted Butter, softened
100g Chocolate Chips, optional
Pearl sugar, or crushed sugar cubes to decorate
For the Glaze:
1 egg and a few tablespoons milk beaten together
Method:
1. Fit your stand mixer with a dough hook, and line two baking sheets with greaseproof paper, and set aside. Dump the flour into a mixing bowl, and add the salt and half of the sugar (60g) to one side of the bowl and the yeast to the other.
2. Carefully add the water, eggs and softened butter to the bowl and mix on a slow speed for 2 minutes, and then on a medium speed for another 5 minutes.
3. Add the remainder of the sugar, and continue to mix on a medium/high speed for a further 5 minutes. At this point the dough should be glossy and elastic. If it isn’t then continue to beat the dough for a few more minutes, checking the consistency regularly. Knead in the chocolate chips by hand if you're using them.
4. Divide the dough into equal pieces weighing approximately 50g each. Shape into smooth balls by pacing the dough on a worktop, cupping your hand over the dough, and gently rolling the dough quickly over the worktop until your ball is perfectly round. Place each ball on the parchment lined baking sheets, allowing sufficient room for them to rise.
5. Lightly brush the exposed surface of the dough with water to avoid the brioche from drying out while proofing. Leave to brioche to rise in a warm place for around 1 hour 30 minutes.
6. Preheat the oven to 200ºC/180ºC fan. Prepare the egg and milk mixture, before brushing the tops of brioche with it. Sprinkle pearl sugar (crushed sugar cubes work too!) on the tops of the buns.
7. Slide the parchment sheets directly onto the wire racks of your oven, and bake for 10 - 12 minutes. Allow to cool before serving. These are fantastic packaged up in cellophane bags as a lovely gift!

In addition to all the brioche buns I baked to take home we were each given a lovely gift basket filled with a variety of Brioche Pasquier products.

With thanks to Brioche Pasquier for the lovely goodies and day in the kitchen.
Comments
Post a Comment